ZTNA Configuration Examples
On this page, an example of how to configure a ZTNA in a real office environment will be shown. By using this example as a reference, users can see a real-world example and will be able to create similar rules in their own workspaces.
Access to Development Server
In this example, the two main menus of the ZTNA(Tunnel and Access Control) are used to create a way for the development team to access their resources securely.
1. Setting up a Tunnel
The first step for this company getting access to their Development Server is to set up a tunnel in ZTNA > Tunnel.
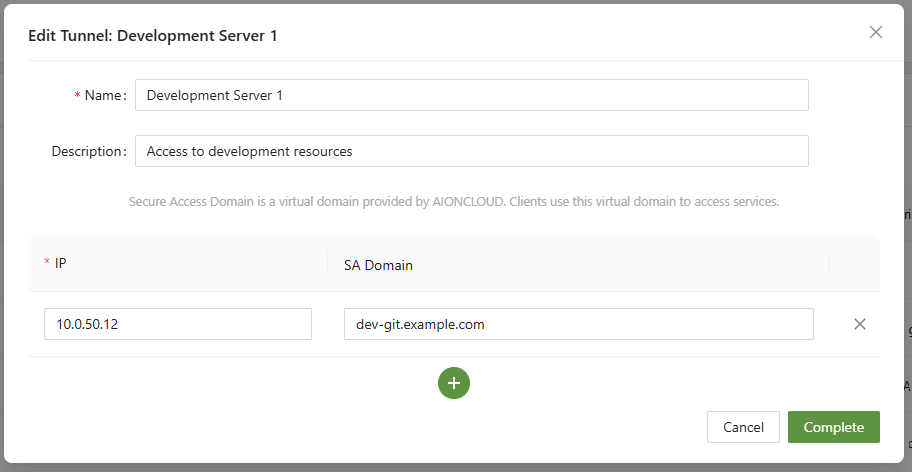
To do so, they entered the IP of their server hosting the resource, and created a unique SA domain of their choosing. The next step is to follow the Connector for Server guide and put the agent on the server.

Once connected, it's time to move on to the next step for configuring access control
2. Configure Access Control
Now that the tunnel is set up and ready we go, it's important to designate who can access the resources. In ZTNA > Access control, an organization can set up an Access Control .
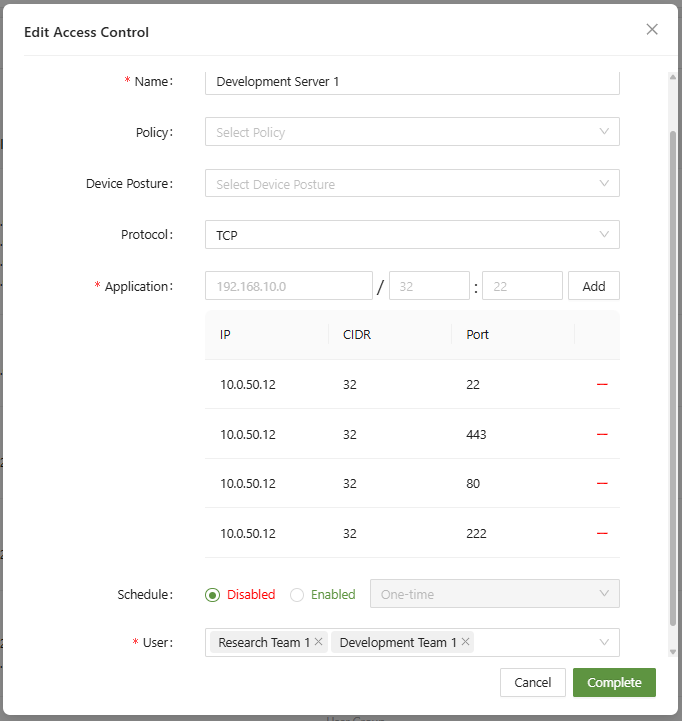
In this menu, they have added the server IP with each relevant port, to be accessed over TCP. Since Access Policies are deny first, users must be added to be allowed access to the application.

Now that the rule is created and activated, members of the Research Team and Development Team can now access their server when connected to the workspace.