SIEM Configuration Guide
This section allows for the creation and delivery of log data to the specified server. Logs can then be transmitted to one, or many servers in a customizable format to integrate with a SIEM system.
Step 1: Enter server information
Enter an IP that the SSE can reach. Use a public IP for internet-reachable SIEMS, or a private IP only when a private network connect exists between the SSE and the SIEM.
In the case below, the SIEM is in a private network, set to listen over port 1514:
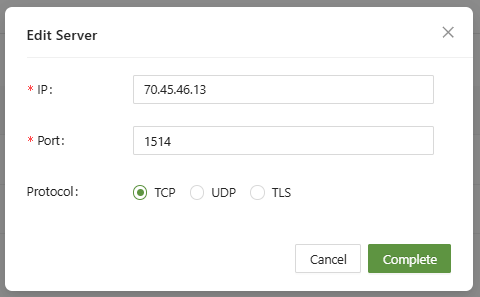
The IP address provided above is the WAN IP of the router for the network where the SIEM is located.
Step 2: Port Forwarding (If Necessary)
If the SIEM is located on a separate network, then port forwarding will be necessary to send relevant traffic to the SIEM:
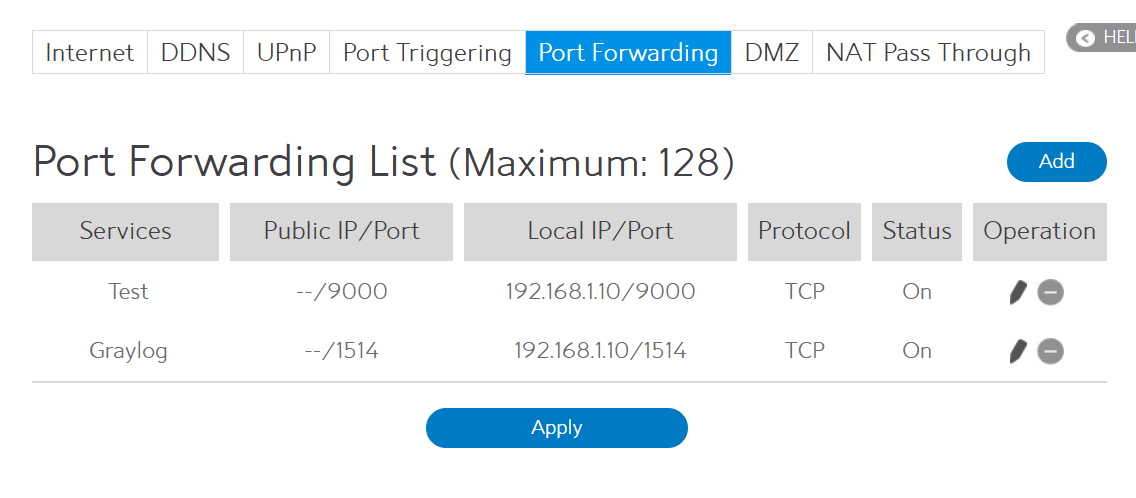
All traffic over ports 9000 and 1514 are being sent to the SIEM(192.168.1.10)
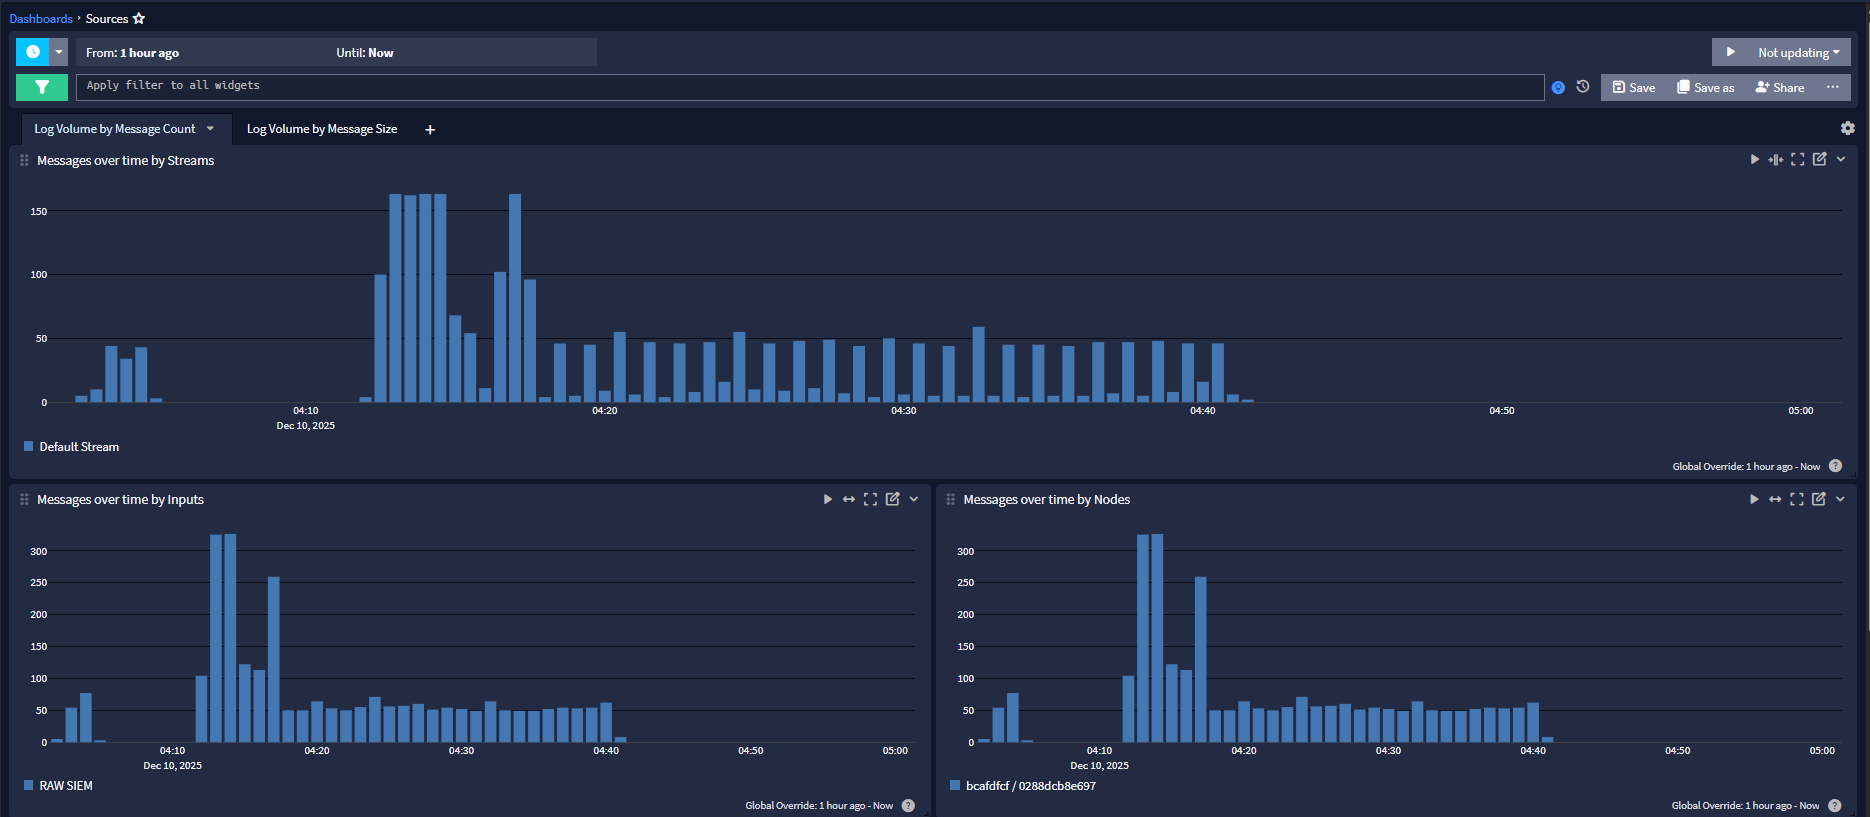
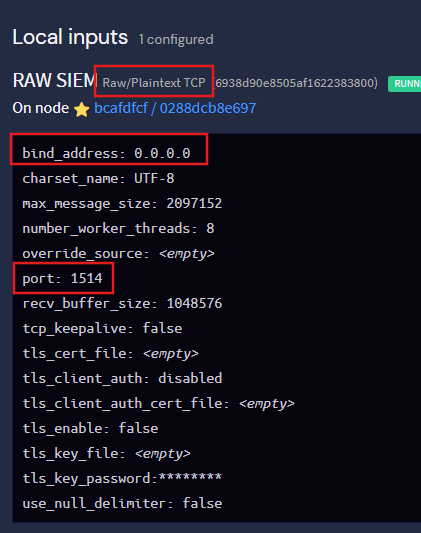
Step 3: Ensure the SIEM is Listening
Depending on the SIEM in use, an input will need to be created to listen to and accept TCP/UDP/TLS traffic over the relevant port.
Step 4: Set up Log Settings
The SSE lastly needs to be told what to send and where.
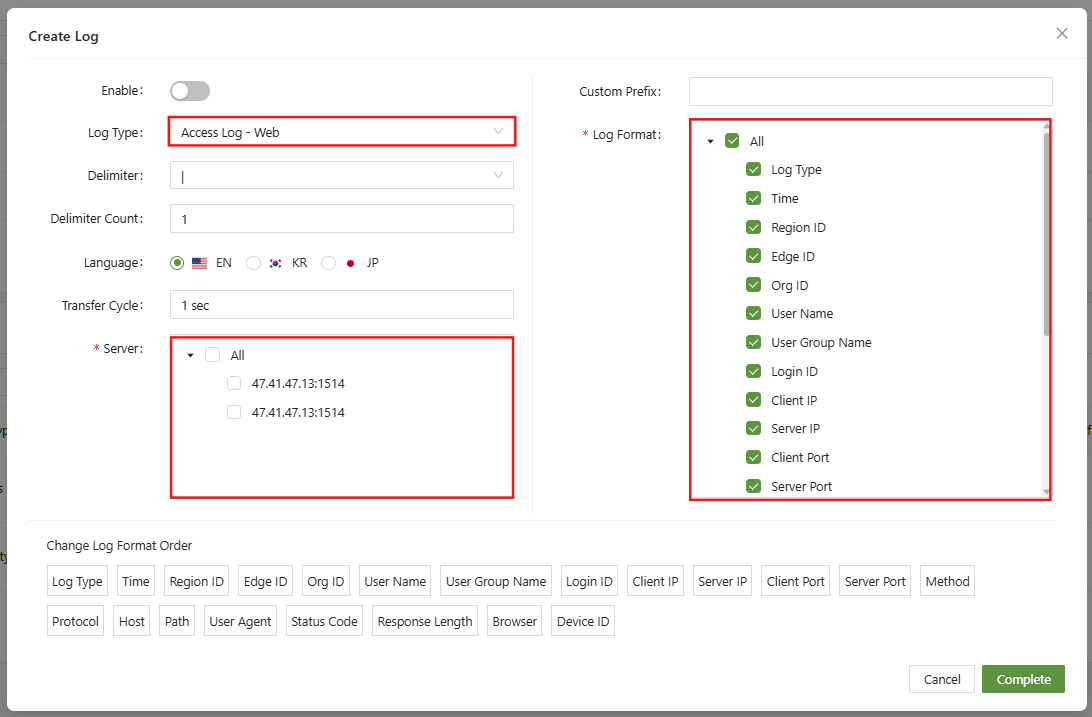
The log type will allow the admin to choose the type of logs to send to the SIEM.
Further down, choose the server from the list of servers added before.
Lastly the Log Format will describe the information that the SSE will send to the SIEM.